ERN: Because MongoDB comes next.
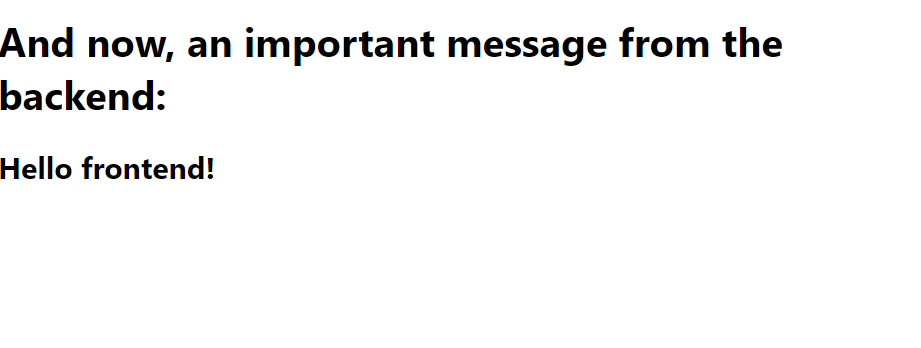
In this post I want to quickly run over my stack and explain the process I used to set up and deploy a barebones Express, Node, and React project. By the end of this tutorial, you’ll know how to make this. It’s the skeleton for my new project, JobHound. Because that link is going to be changing regularly, I’m including a screenshot here of what it looks like at the time of this post:
This may look like an extremely simple site (and it is), but under the hood there’s more here than you think. This app features:
- a backend built with NodeJS and Express,
- a frontend built with React using
create-react-app, - communication between the frontend and backend using the
axioslibrary, with conditional rendering based on the success or failure of that communication
The whole thing is deployed using my DigitalOcean droplet, with a combination of Nginx and pm2.
It’s a lot of the busy work of putting together a project like this, and my goal is to get it out of the way first so I can focus on what I really like: coding.
So, without further ado, let’s get into it!
Part 1: Creating the Backend
For this part, you will need:
- NodeJS installed on your computer (if you aren’t familiar with NodeJS, check out their website)
- familiarity with JavaScript
- basic comfort with the command line and using package managers (NPM in this case)
To get started, we’ll first initialize an empty folder in the directory we want to store the project. You can do this in a file explorer or use the mkdir command, your choice.
mkdir [new-project](You can replace “new-project” with the name of the project you’re making.)
Because our application has a split frontend and backend, we’ll need to initialize each project separately. They’ll both be Node applications, but will feature a different set of dependencies and thus require different directories and package.json files.
We’ll build the backend first. Navigate into your new folder using the cd command and make a second folder inside the first:
cd new-project
mkdir backend
From there, we’ll initialize a new node program using the following command. This will ask you a couple of questions, and you can respond to them with the relevant information for your project (or just skip them entirely).
npm init Next, we have to install some packages. Our backend will primairly use Express, so we’ll start there. Additionally, we’ll want to install the node CORS package (allowing the frontend and the backend to communicate from different origins), and the nodemon package, which will automaticaly reload the server when changes are detected.
You can install them all at once, like so:
npm install express cors nodemonWith the setup out of the way, let’s code our backend! It’s extremely simple, and will take about a minute:
const express = require('express')
const cors = require("cors")

var app = express()
app.use(cors())


app.get('/api', (req, res)=>res.json("Hello frontend!"));

app.listen(5002)
That’s it! Let’s break down what we’re doing here.
First, bring in our two main packages, express and cors using the require() method. Our app is then intialized (var app = express()) and given the CORS middleware to use (app.use(cors())).
Then, we create a single route at /api. This route, when accessed, sends a single JSON message. That little proof of communication is all we need to do right now, but it will provide the foundation for the rest of our backend calls.
And that’s it! We’ve created the skeleton of our backend. Now it’s time to do the same for the frontend.
Part 2: Creating the Frontend
First, navigate back to the main directory of your project. If you still have your previous terminal window open, you can use the command
cd ..to go back. Now, we’re going to create the frontend. Setting up React on our own requires quite a bit of finagling, but luckily the creators of the framework have provided a handy command that streamlines the process.
In the command line, type the following:
npx create-react-app clientSit back for a minute or two while the command does its thing. This will probably be the longest single command you’ll run.
What does it do? Let’s break it down word by word.
-
npxis a tool used to execute node packages. We don’t usenpmbecuase we want to do more than just install packages; we want to create the scaffolding for a project. -
create-react-appis the name of the package to execute. Behind the scenes, it installs a number of different packages and configures them, taking care of the hard parts of setting up a React project and letting us focus on coding. -
clientis the name of our React project. In practical terms, this is the name of the folder thatcreate-react-appwill install React in.
When the command is finished running, navigate into the new folder and start the React project like so:
cd client
npm start
This should produce a page that will be quite familiar to anyone who has used create-react-app before.
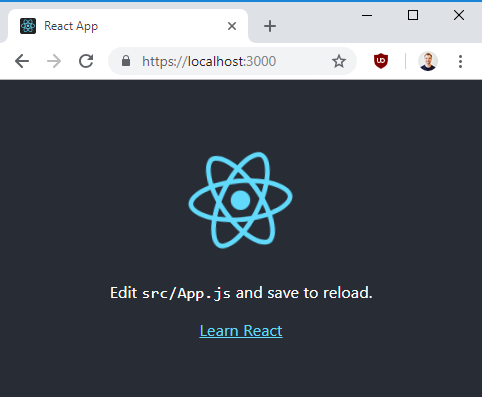
(Thanks to this post for the picture, since I forgot to get one myself.)
Before we leave the terminal, we need to install one more package: axios is an HTTP client for the browser that’s a bit easier to work with than the built-in fetch() method.
Let’s go ahead and install that now the same way we installed the packeges in the backend. Hit Control-C to stop the server (we don’t need it yet). Then type the following command.
npm install axiosNow it’s time to actually code our frontend. Just like the backend, it’s pretty simple. Delete everything that’s in the current App.js file, and replace it with the following:
import React, {useState, useEffect} from "react"


import axios from "axios"


const App = () => {
  const [message, setMessage] = useState("")

  useEffect(()=>{
    axios.get("http://localhost:5002/api")
      .then(res=>setMessage(res.data))
      .catch(err=>console.log(err))

  }, [])

  return (
    <div>
      <h1>And now, an important message from the backend:</h1>
      <h2>{message ? message: "Loading..."}</h2>
    </div>
    )
}

export default App;
This isn’t a primer for React, so I’m going to assume that you know what useEffect and useState are. If not, you can check out this guide to hooks in the official React documentation. You can also check out this introduction to React if you’re totally new to the framework.
Suffice to say, this component creates a piece of state called “message” and on initialization requests content from an api endpoint. This is the same endpoint that our backend is listening from (port 5002, “/api”). When it recieves a response, it uses the setMessage() function to store the message in our piece of state.
Finally, the function returns a piece of JSX. We use conditional rendering to either outpot the message or “Loading…” to show that we are still requesting something from the backend.
And that’s it! Now it’s time to actually run the thing. I do this using two different command lines: one for the frontend and one for the backend. On your first command line, navigate to your backend server and intialize the backend with your nodemon command:
nodemon server.jsOn your other window, navigate to your client server and initialize the frontend with your start command:
npm startThis should start the frontend in a new tab. If you did everything right, you should see the same message as I have at the beginning of this document.
Congratulations! You have successfully created a functional frontend and backend that speak to each other, and laid the groundwork for a much more complex project. Now go on to Part 2 of this tutorial, where you’ll learn how to host it.